
Welcome to LiveAnswer. Your portal is where you set up and manage your AI receptionist: the name and voice it uses, what it knows about your business, who it transfers calls to, and how it handles website chat and email. It's also where you check your calls and manage your plan.
You don't need any technical background. Most people finish setup in under half an hour.
Signing in
Your LiveAnswer provider sends you a login link and a temporary password when your account is created. Sign in, then change your password when prompted.
Heads up: Keep your login private. If someone else needs to help manage your receptionist, ask your provider to add them rather than sharing your password.
Finding your way around
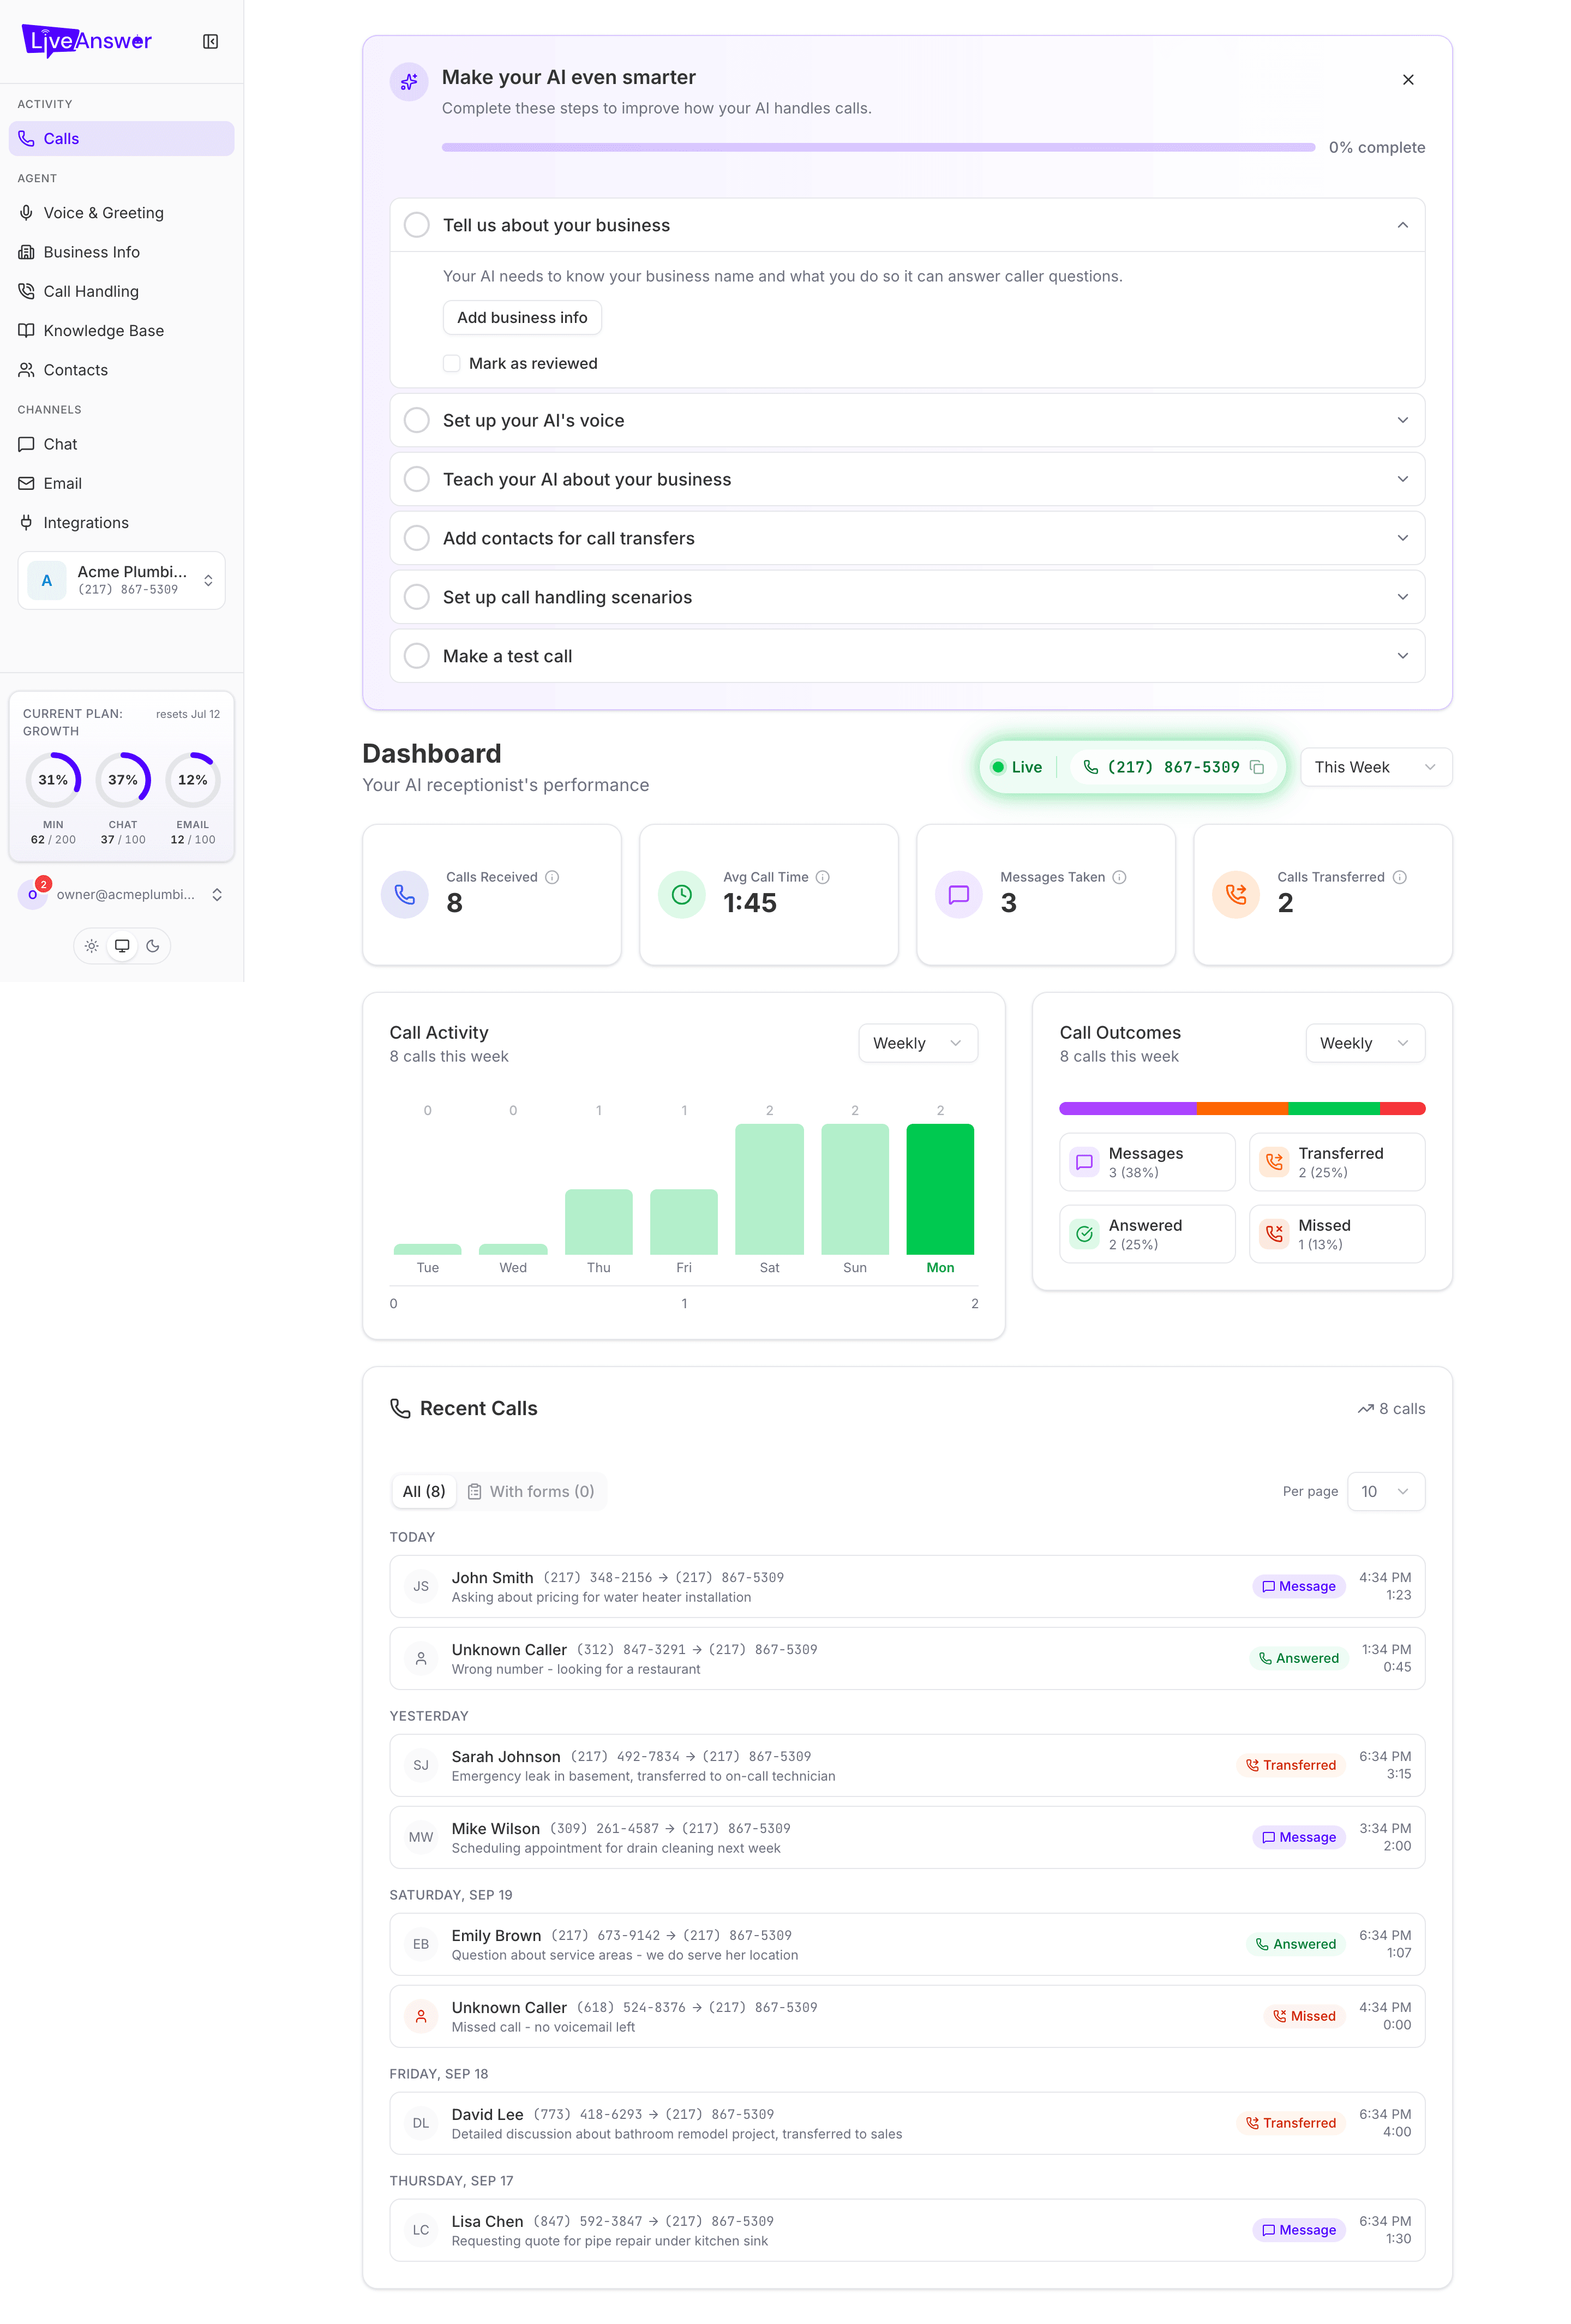
The left sidebar is organised into three groups:
| Group | Pages | What it's for |
|---|---|---|
| Activity | Calls | See what your AI has been doing: call volume, outcomes, recordings, and messages taken |
| Agent | Voice & Greeting, Business Info, Call Handling, Knowledge Base, Contacts | Everything that shapes how your AI sounds and what it says and does |
| Channels | Chat, Email, Integrations | Put your AI on your website, connect email, and link tools like your CRM |
Below the menu you'll find:
- Agent switcher — your active agent's name and phone number. If you have more than one agent, click it to switch.
- Current plan — three small dials showing how much of this month's minutes, chats, and emails you've used. Click the card to open Plan & Billing.
- Your account — your email address, with a red badge when you have unread notifications. Click it for notifications and sign out.
- Light / dark mode — the three small buttons at the very bottom.
On a phone or tablet the sidebar collapses behind the menu button in the top-left corner.
The setup checklist
When you first sign in, the Calls page shows a checklist called Make your AI even smarter. It walks you through the six steps that matter most, in order:
- Tell us about your business — see Business Information.
- Set up your AI's voice — see Voice & Greeting.
- Teach your AI about your business — see Knowledge Base.
- Add contacts for call transfers — see Contacts.
- Set up call handling scenarios — see Call Handling.
- Make a test call — dial your LiveAnswer number and hear it for yourself.
Each step ticks off as you complete it. The checklist disappears once everything is done, or you can dismiss it early.
Your phone number
The green Live badge at the top of the Calls page shows the phone number your AI answers. Forward your existing business line to it, or publish it directly. Your provider can help with call forwarding if you're not sure how.
A note on words we use
- Agent — one AI receptionist. Most accounts have one; multi-location businesses may have several.
- Scenario — a type of call your AI recognises (for example "Emergency repair") and a set of steps it follows when it hears one.
- Contact — a real person your AI can transfer calls to.
- Plan — your monthly package: included minutes, chats, and emails.
- Add-on — an optional extra on top of your plan, such as a pack of extra minutes.
Where to go next
- Start with Business Information, then Voice & Greeting. Those two pages are all your AI needs to answer its first call well.
- Want to see it work straight away? Open Chat and talk to your AI in the live preview.